
Part 4
After disassembly, today’s update is all about the clean-up of the keyboard and case.
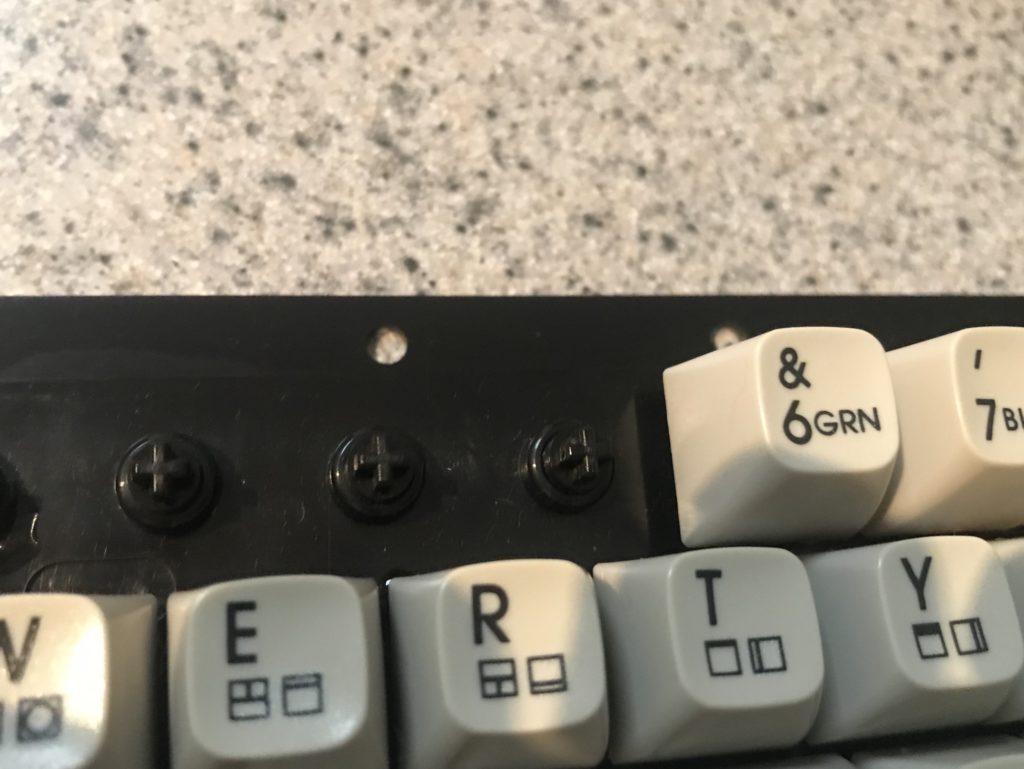
After 34 years of dust and UV light, the keys are yellowed and the case is quite grotty.
Keyboard Mechanism
The keyboard mechanism is in pretty good shape after about 30 years, but is full of dust bunnies. Eight screws will separate it from the top part of the case.
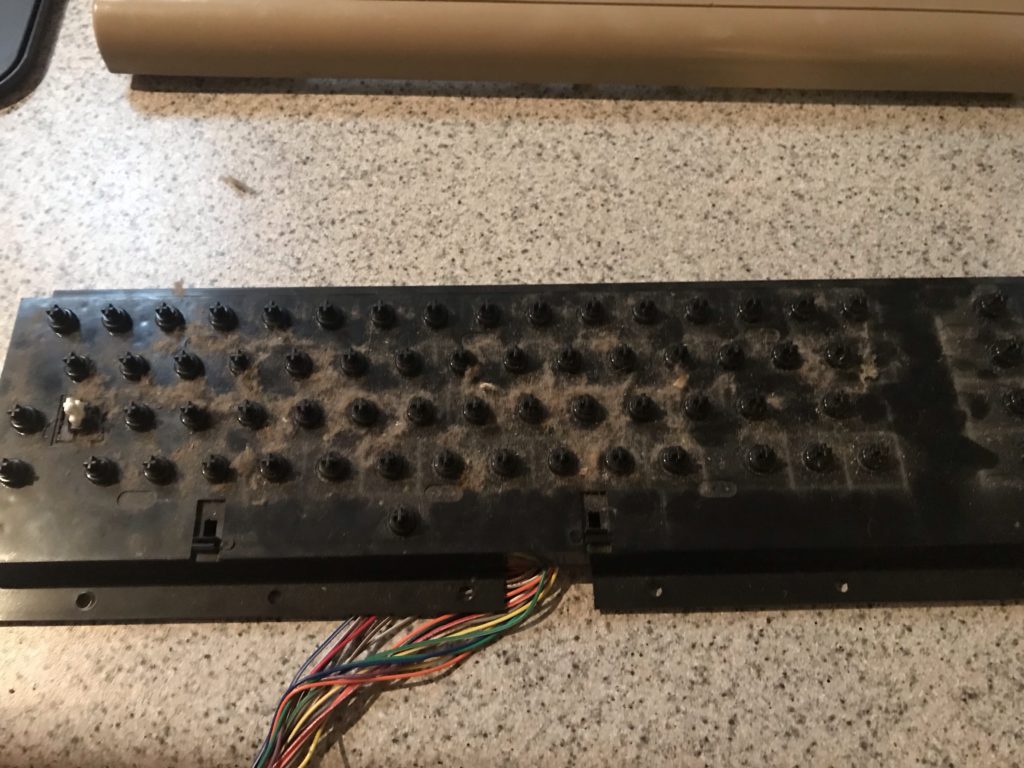
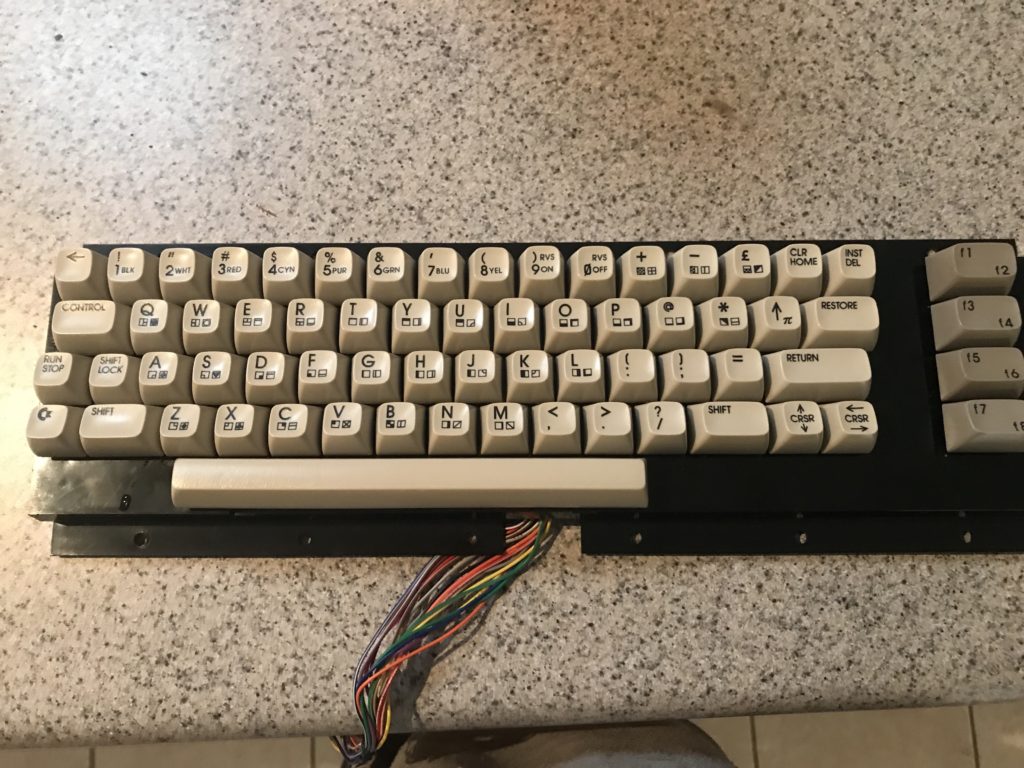
So after removing all the keys and springs, it is time for a clean. Be super careful to remove the keys *gently* – too much force risks breaking the posts the keys sit on, and then you’ll be in a world of hurt.
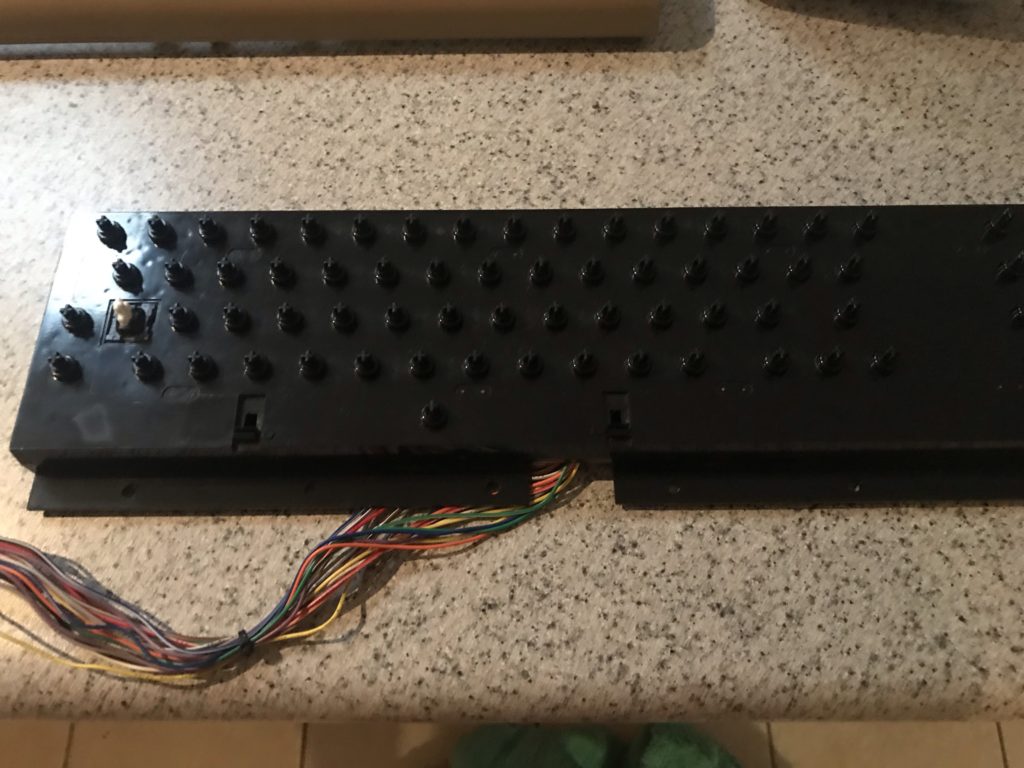
A going over with a handheld vacuum and a quick spray and wipe with just a little glass cleaner, and the transformation is excellent.
Just a note on the springs – the spring under the space bar is deliberately stiffer/stronger than every other spring in the keyboard – so put that spring aside separately so it goes back under the space bar. There is also no spring under the Shift-Lock key.
I inspected all of the key posts, and while they are not all “perfect”, they all seem to move freely and once the keys are back on with their springs, they should be fine.
The last time I used the computer about 10 years ago, I do remember that all the keys still functioned. It will be interesting to see if all of the contacts underneath are still fine 10 years on.
I suspect so and certainly hope so, but I’ll find that out later.
The Actual Keys
All of the keys are pretty grotty and yellowed. This is almost certainly caused by lack of cleaning over the years, and exposure to UV light.
My computer was almost always proudly set up on my desk, by the window so I could look out and ponder the universe while working on whatever piece of programming I was working on at the time.
So there’s your source of UV light.
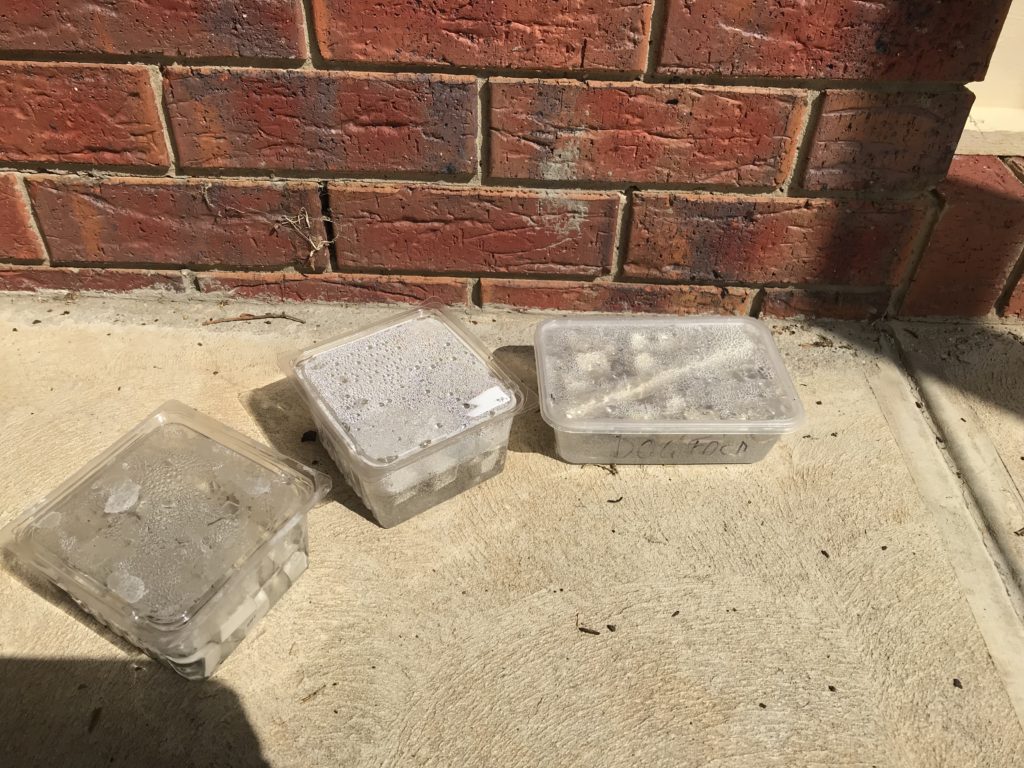
Having removed all of the keys and put the springs aside, I’m going to try what is daggily known in the computer restoration world as “retrobriting”.
There are quite a few popular methods of doing this, as demonstrated in this excellent video from The 8-Bit Guy:
I tried a couple of these methods using products that I already had around the house, before I went and spent any money on some of the others.
Each was ineffective, so eventually I settled on the “hydrogen peroxide in the sun” method, with great results.
My keys are now back to their glorious original whiteness – compare the picture above with the following “after” shot:
This did take approximately four days in the sun – it hasn’t been particularly sunny around here of late, so it probably took significantly longer than it might have had decent sunshine been available.
Ironically, if my C64 still had its original keyboard, with its dark brown keys, I would probably only have to have given them a quick clean due to them being such a dark colour.
Oh well!
I put all the springs and keys back together – (using a picture I took of the keyboard beforehand to make sure I put them all back in their correct spots!) – and it looks fantastic.
The Case
As you will have seen in the retrobriting video, bathing the yellowed plastics in a big bath of hydrogen peroxide whilst in the sun is an effective method of cleaning them up.
Hydrogen peroxide is listed on the “dangerous chemicals” list in Australia. Getting enough of it in reasonable amounts to do this kind of work is difficult.
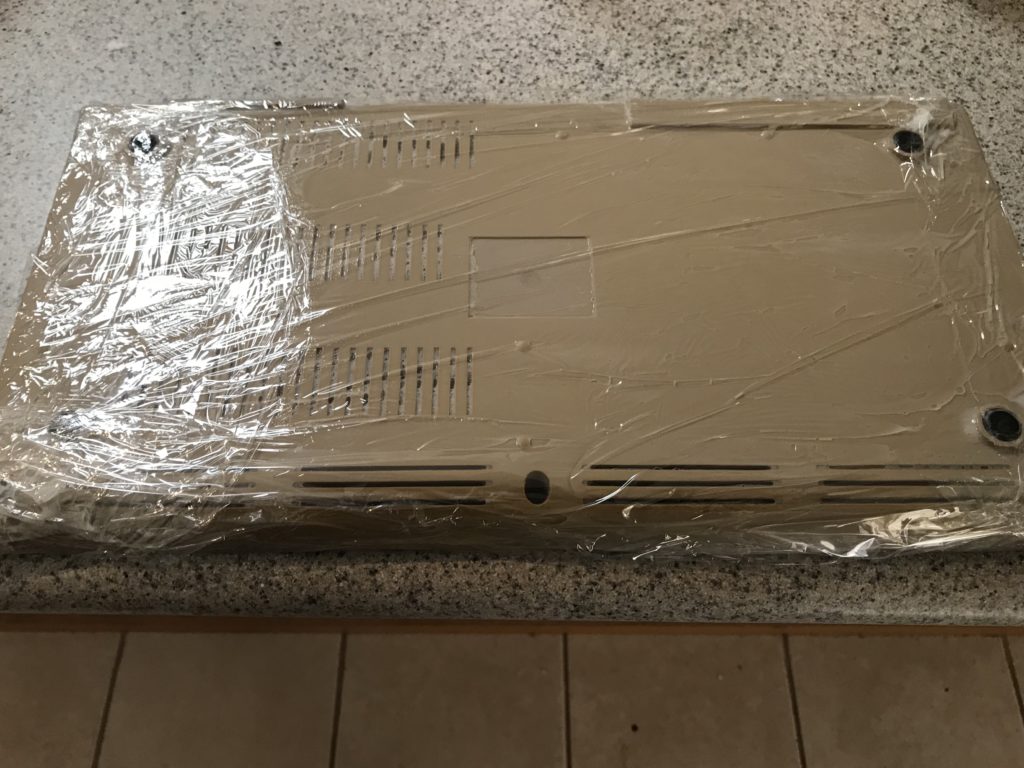
So for the case pieces, I decided to go for the hydrogen peroxide cream and cling wrap method. The creme is available in just about any chemist, and only costs a few dollars.
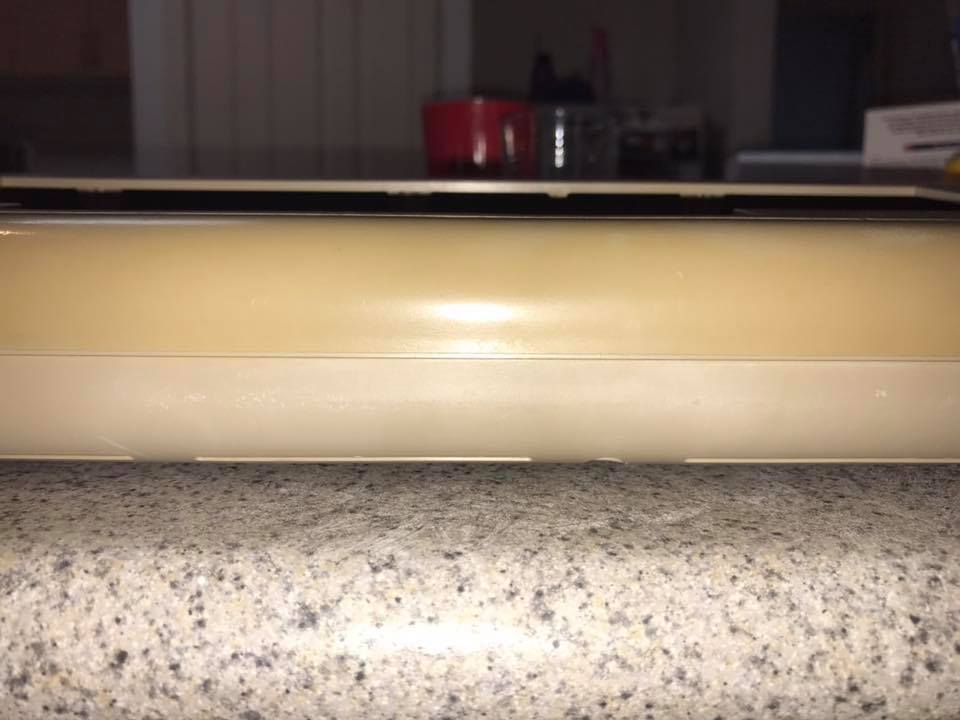
To begin, I pulled the old serial number label off the bottom of the bottom case section, to get an idea of the exact original colour of the plastic.
Following the method in the retrobrite video, I painted the bottom case over with the hydrogen peroxide creme, wrapped it up and left it in the sun, rotating it every 10 to 15 minutes to get even exposure.
And within about 90 minutes, the colour exposed under the old serial number sticker matched the rest of the case. A total of 34 years of yellow gone in 90 minutes.
I popped the top and bottom half of the case together to demonstrate the difference:
After such great success, I used the same method on the top case piece for about the same amount of time. Once again rotating it every 10 to 15 minutes, I received the same outcome – with an almost perfect colour match with the bottom piece.
Putting the Case Back Together
Having reassembled the keyboard and mounting it back into the top section of the case, I clipped and screwed the two case sections back together.
The visual transformation is complete – before and after:


Parts Already Purchased
- Raspberry Pi 3 Model B+ – $98.95 AUD from Logicware Australia via eBay, though I had a $20 eBay credit, so only $78.95 AUD.
- SPST Mini Rocker Switch – $1.95 AUD from Jaycar Electronics.
- Keyrah V2 – $57.85 AUD from Amiga Store.
- Four 200ml bottles of Hydrogen Peroxide – 4 x $4.00 AUD from Woolworths – I bought all of the bottles left on the shelf at the local!
- Two bottles of 40 VOL Peroxide Creme – 2 x $8.95 AUD from Priceline Pharmacy – though I ended up only needing one bottle.
Next Steps
For Part 5, I’ll be addressing a significant issue I’ve had with the case of my C64 – read about it here.