
Part 2
Moving on, I’ve selected the set of parts I plan to use for the C64 Resurrection. Largely, I’ll be following the basic plan as outlined in this article, though I’ll be making a few minor variations.
Raspberry Pi 3 Model B+
Although the article I’m working from uses a Raspberry Pi 3 Model B, I’ve chosen to use the later version, the Raspberry Pi 3 Model B+.
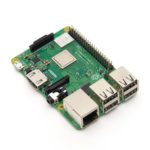
The B+ is largely the same as the B, but has a faster processor, and better Wifi connectivity. All my reading suggests RetroPie supports the B+.
Therefore this change should make no impact on functionality.
I’ve also ordered mine with heatsinks and an official Raspberry Pi power supply, just to cross a few T’s and dot a few I’s.
PowerBlock
The PowerBlock device as suggested in the guide article seems to be a sensible addition to me.
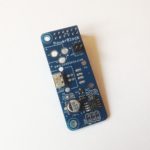
It should protect from data corruption from incorrect or overzealous shutdowns of the Pi. No brainer for me.
Keyrah
This is also a no brainer, as there seems to be no other simple and freely-available way to connect the standard Commodore 64 keyboard to the solution.
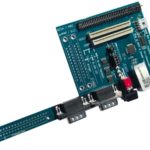
As I write, the official supplier of the Keyrah v2 is out of stock, so I may need to look around for resellers of this piece.
Thingiverse Mounting Brackets
These mounting brackets, as found on Thingiverse and used in the guide article, seem to be the best options in this space.

I found a few other options that do the same thing. The Thingiverse choice comes with all the holes for sockets and plugs already in place, and all the others do not. I’d rather just get them with the holes already there, and save the hassle.
I also don’t have a 3D printer, and the options for ordering them pre-printed don’t deliver to Australia, or not at a reasonable price, thus I’ll have to find a printing option in Australia.
Other Changes
In the guide article, a couple of good suggestions for improvements are made. These are for an external audio jack, and an external USB jack.
I’m not going to bother with the USB jack idea. I’m going to have a 16GB USB stick inside for storage purposes, and I’ll connect the Pi to my network wirelessly. Then using SSH/SCP, I’ll use the network to copy data to and from the Pi.
Having a USB interface is probably useful in many cases, but I just can’t see myself using it very often.
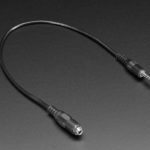
I will however add the external audio jack. I’ll use an audio cable with a panel mount interface on one end, and drill an appropriate sized hole in one of the mounting brackets to set it up.
Cables and Other Bits and Pieces
The required cables and the like are fairly standard electronics shop fare.
As such, I’m not going to be specific about those at this stage, and I’ll treat them as consumable items.
Parts Already Purchased
- Raspberry Pi 3 Model B+ – $98.95 AUD from Logicware Australia via eBay, though I had a $20 eBay credit, so only $78.95 AUD.
- SPST Mini Rocker Switch – $1.95 from Jaycar Electronics.
Next Steps
In Part 3, I’ll do the teardown of my Commodore 64 to remove the genuine motherboard, and get ready for cleaning everything up to look their best in Part 4.